Hey Pals!
Here comes another finals week post (AGH)
I have found that the best way for me to be successful, is to write out everything clearly (sometimes with a fun creative flair) so that all my obligations are right in front of me and easy to read!
So I decided to come up with an easy to make calendar so you can outline your next few weeks easily!
Supplies:
-2/3 sheets of paper (depending on how many weeks you want to plan
*consider printing fun patterns from the computer on a full page of paper, or scrapbook paper!
-scissors
-colorful pens, a pencil, and a black sharpie
-a ruler
-washi tape
-post-it notes
Step 1:
Cut your 2/3 base pages to approx 8.5x11- the size of a normal piece of computer paper
Step 2:
Measure out your weeks and color them in.
-Holding the page landscape form, draw a horizontal line down the middle of the page
-For the top row of boxes with only 3 days, each box is 3.5 inches wide
-The bottom row boxes are 2.6 inches wide
-Add a line 1 inch from the top of the page, and 1 inch from the middle line to create the boxes for the day titles
-Write over all your pencil lines in sharpie
Step 3:
Write in your days of the week!
Step 4:
Use Washi Tape to attach the three calendars together either vertically or horizontally
Step 5:
Using your own color coding system, start to fill in exams, and try to plan out time to study.
*I also used cute inspirational quotes and journaling cards to block out dates where I won't be studying due to events on campus or at home
Step 6:
Use Washi Tape to attach the calendar to your wall and start living the organized life!
xoxo, CourtneyBridget
Showing posts with label craft. Show all posts
Monday, April 25, 2016
Sunday, February 7, 2016
DIY 'My Favorite Places' Canvas
Well Hey There Pals!
So in a moment of feelin' a little low, I decided to drive myself out to Michaels craft store off campus. I needed a moment to just be alone, not thinking about my responsibilites, or what auditions I have to go to. I just wanted to wander the aisles, looking at all the stuff I probably shouldn't buy because I need to pay for real things like food.
I found myself feeling a bit homesick, and thought 'how can I create a little homage to my lovely island?'
And I ended up with this:
What You'll Need:
-A Level 1 Canvas {I used 8x10, but you can use any size you'd like!}
-Modpodge & brush
-Scissors
-Rhinestones or small embellishments
-Scrapbook paper
-Sharpie or pen
-Super Glue
Step One:
Go on your computer and find 2 images. 1 being a very detailed map of your hometown, your state, your county, whatever it is you'd like to have with you at college. You will use this as a guide for all your points! The 2nd being a PNG file, black outline map of the same area. You want very little details and no labels.
Step Two:
Head over to an editing site like 'Pic Monkey', and paste your PNG file onto a blank white canvas. Add whatever background color you'd like! My dorm is all white, blue and gold, so I went with a very light turquoise.
Step Three:
Print it all out in color!
Step Four:
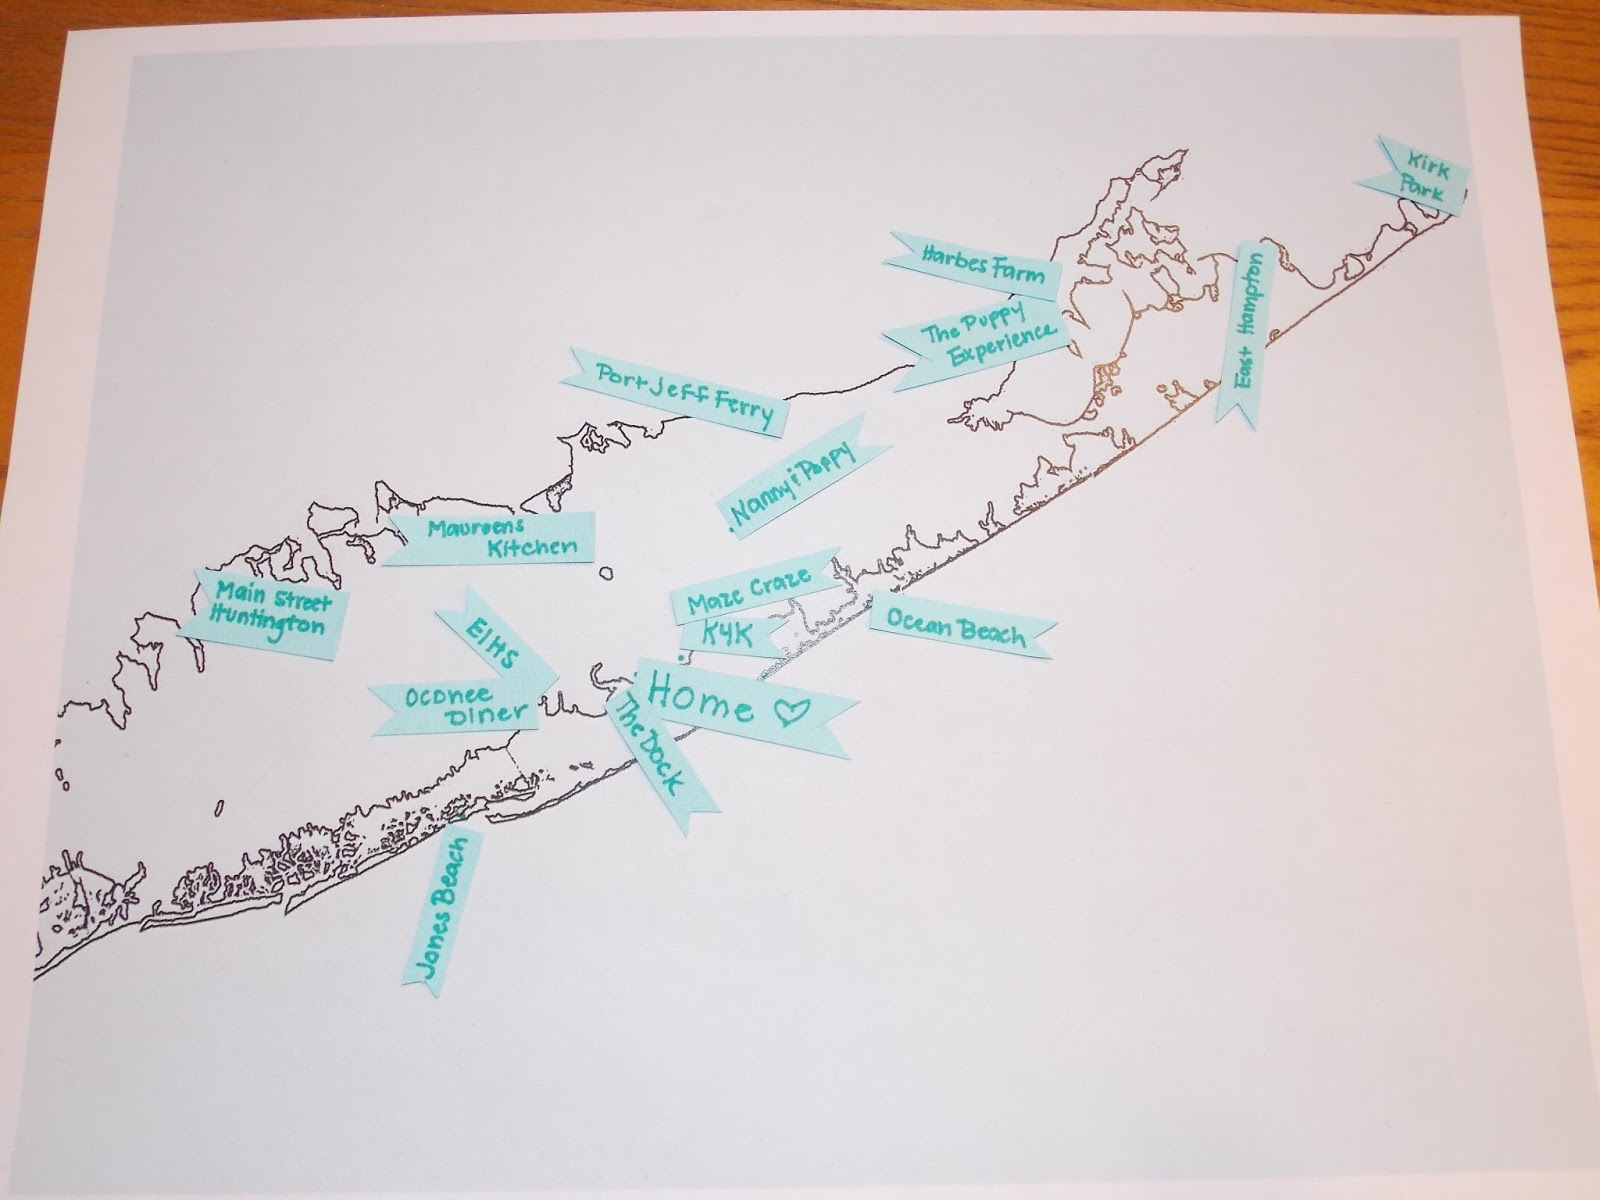
Take your scrapbook paper and very carefully write out the names of all your favorite places. You want these to be quite small because if some of your pinpoints are close together, you want to be sure there is no overlapping! Cut each of your tags out in whatever shape you want, I did these little flags! **Be sure to leave a little space before the beginning of each name for your embellishments or rhinestones!
Step 5:
Now is time to Modpodge your outline map to your canvas. Go SLOWLY! This is really easy to screw up and end up with a cockeyed canvas, so take your time! First apply Modpodge directly to the canvas like a glue, and lay your map on top, as smooth as possible. Give it a few seconds to dry, try and smooth out any bubbles. Then apply another coat of Modpodge on top of the map like a sealant. Let dry for 15 minutes.
Step 6:
Lay out all your tags on your map to see what arrangement works best for you!
Step 7:
Start gluing! One by one glue down your tags. Don't go glue crazy, a little bit goes a long way! Let the glue dry for 10 minutes.
Step 8:
Add your embellishments like little pinpoints on your map! Let dry for 5 minutes.
Step 9:
Fold each tag up ever so slightly so they stand away from the canvas, making it more three dimensional!
And there you have it! I absolutely loved this, and am so happy to see it on my wall everyday!
If you decide to do this craft, tweet me @messyndthriving or tag me in a picture on Instagram @MessyAndThriving so I can see!!
xoxo, CourtneyBridget
So in a moment of feelin' a little low, I decided to drive myself out to Michaels craft store off campus. I needed a moment to just be alone, not thinking about my responsibilites, or what auditions I have to go to. I just wanted to wander the aisles, looking at all the stuff I probably shouldn't buy because I need to pay for real things like food.
I found myself feeling a bit homesick, and thought 'how can I create a little homage to my lovely island?'
And I ended up with this:
What You'll Need:
-A Level 1 Canvas {I used 8x10, but you can use any size you'd like!}
-Modpodge & brush
-Scissors
-Rhinestones or small embellishments
-Scrapbook paper
-Sharpie or pen
-Super Glue
Step One:
Go on your computer and find 2 images. 1 being a very detailed map of your hometown, your state, your county, whatever it is you'd like to have with you at college. You will use this as a guide for all your points! The 2nd being a PNG file, black outline map of the same area. You want very little details and no labels.
Step Two:
Head over to an editing site like 'Pic Monkey', and paste your PNG file onto a blank white canvas. Add whatever background color you'd like! My dorm is all white, blue and gold, so I went with a very light turquoise.
Step Three:
Print it all out in color!
Step Four:
Take your scrapbook paper and very carefully write out the names of all your favorite places. You want these to be quite small because if some of your pinpoints are close together, you want to be sure there is no overlapping! Cut each of your tags out in whatever shape you want, I did these little flags! **Be sure to leave a little space before the beginning of each name for your embellishments or rhinestones!
Step 5:
Now is time to Modpodge your outline map to your canvas. Go SLOWLY! This is really easy to screw up and end up with a cockeyed canvas, so take your time! First apply Modpodge directly to the canvas like a glue, and lay your map on top, as smooth as possible. Give it a few seconds to dry, try and smooth out any bubbles. Then apply another coat of Modpodge on top of the map like a sealant. Let dry for 15 minutes.
Step 6:
Lay out all your tags on your map to see what arrangement works best for you!
Step 7:
Start gluing! One by one glue down your tags. Don't go glue crazy, a little bit goes a long way! Let the glue dry for 10 minutes.
Step 8:
Add your embellishments like little pinpoints on your map! Let dry for 5 minutes.
Step 9:
Fold each tag up ever so slightly so they stand away from the canvas, making it more three dimensional!
And there you have it! I absolutely loved this, and am so happy to see it on my wall everyday!
If you decide to do this craft, tweet me @messyndthriving or tag me in a picture on Instagram @MessyAndThriving so I can see!!
xoxo, CourtneyBridget
Subscribe to:
Posts (Atom)